Pages

22 August 2010

It's my birthday!

It's my birthday!

Wil_wheaton_birthday_geekdad_awesome
And I am having the best birthday, ever! Thank you to everyone who has wished me happy birthday on the Facebook, and if August 22nd is your birthday too, happy birthday to you!

03 August 2010

Short Message Service (SMS) Support in Sun Java System Messaging Server 6.3

Short Message Service (SMS) Support in Sun Java System Messaging Server 6.3

Joe Sciallo, April 2007
This article discusses Short Message Service (SMS) support within Sun Java System Messaging Server 6.3. You can utilize SMS as a means to quickly notify users with a more real-time, "push" style of communications, for example, to let users know of emergency conditions that require their prompt action.

Quick SMS Overview
Here is the definition of "Short message service" from Wikipedia*:
Short Message Service (SMS) is a telecommunications protocol that allows the sending of "short" (160 characters or less) text messages. It is available on most digital mobile phones and some personal digital assistants with onboard wireless telecommunications. The individual messages which are sent are called text messages, and more colloquially SMSes, texts, or even txts (in "text speak").
SMS gateways exist to connect mobile SMS services with instant message (IM) services, the world wide web, desktop computers, and even landline telephones (through speech synthesis). Devices which can connect to mobile phones and PDAs through protocols such as Bluetooth can also sometimes use that link to send SMS messages over the wireless network. SMS arose as part of the widely deployed GSM protocol, but is now also available with non-GSM systems.
The most common application of the service is person-to-person messaging, but text messages are also often used to interact with automated systems, such as ordering products and services for mobile phones, or participating in contests. There are some services available on the Internet that allow users to send text messages free of direct charge to the sender, although users of North American networks will often have to pay to receive any SMS text message.

SMS Support in Messaging Server 6.3
The short of it is that yes, Messaging Server does support SMS, specifically as a channel within the Messaging Server Message Transfer Agent (MTA).
Messaging Server implements email-to-mobile and mobile-to-email messaging using SMS. You can configure SMS as either one-way (email-to-mobile only) or two-way (both email-to-mobile and mobile-to-email). To enable one-way service only, you must add and configure the SMS channel. To enable two-way service, you must add and configure the SMS channel, and in addition, configure the SMS Gateway Server.
For both one- and two-way SMS, the generated SMS messages are submitted to a Short Message Service Center (SMSC) using the Short Message Peer to Peer (SMPP) protocol. Specifically, the SMSC must provide a V3.4 or later SMPP server that supports TCP/IP.
The following figure shows these configurations:
logFlowOneTwoWaySMS
One-way SMS: To enable one-way service, the Messaging Server implements an SMPP client (the MTA SMS channel) that communicates with remote SMSCs. The SMS channel converts enqueued email messages to SMS messages as described in C.2.2 The Email to SMS Conversion Process of multipart MIME messages, as well as handling character set translation issues. Operating in this capacity, the SMS channel functions as an (SMPP) External Short Message Entity (ESME).
Two-way SMS: Two-way SMS enables the mail server not only to send email to remote devices, but allows for receiving replies from the remote devices and for remote device email origination. Enabling two-way SMS service requires both the MTA SMS channel (SMPP client), as explained in the previous topic, and the SMS Gateway Server. Sun Java System Messaging Server installs an SMS Gateway Server as part of its general installation process, which you must then configure.
For more information, see Appendix C, Short Message Service (SMS) in the Sun Java System Messaging Server 6.3 Administration Guide.

SMS Mailbox Access and Calendar Gateway
In addition to the SMS functionality built-in to Messaging Server, a couple of Sun Professional Services folks independently developed an SMS Gateway solution for use with Messaging Server and Calendar Server. Dubbed SMS Mailbox Access and Calendar Gateway, this solution is primarily targeted at service providers to add value for their subscriber base, though other types of organizations could certainly also use the gateway.
The SMS Gateway provides the following functionality:
  1. SMS Notification. Receive SMS information about each email delivered to the subscriber's mailbox. Depending on user-configured settings, the following information can be sent in the SMS body: sender, email subject, date and time, size attachment information, and more. Furthermore, the subscribers can read emails using their mobile phones. It is just a matter of responding to the SMS notification and the first part of the email body will be received as another SMS on the mobile device shortly thereafter. To receive another part the subscriber has to respond with SMS to the first one, to receive the third, respond to the second, and so on, until the whole body has been transferred.
  2. Mailbox management via SMS. This enables support for basic email services. Subscribers can use SMS messages to reply to, forward, or delete the mail stored in their mailbox to receive mailbox status information (for example, the number of messages, how many have been read, and so on), as well as detailed attachment data (filename, type, and size). Mailbox management features also include the ability to send emails using SMS messages and to change notification parameters.
  3. Calendar Event Information. SMS Gateway sends SMS messages containing information on events in the subscriber's calendar (Calendar Server) to the subscriber's mobile phone (depending on user-configured settings). These can include reminders for pending appointments, invitations to meetings, and so on.
The SMS Gateway requires Messaging Server, Calendar Server, Directory Server, and custom components developed by Sun.

Comparison of Messaging Server SMS Channel and SMS Mailbox Access and Calendar Gateway
It's interesting to note that the built-in SMS functionality to Messaging Server and the SMS Mailbox Access and Calendar Gateway do not compete, but are in fact complementary. Here is a summary of the features in both:
SMS Channel
  • General-purpose email/SMS and SMS/email gateway
  • SMS notification sent as email passes via the channel; mailboxes are not involved
  • Provides historical record of the messages sent, so mobile users can respond to notifications to reply to email messages
  • Supports Delivery Status Notifications (DSNs)
SMS Gateway
  • SMS Gateway sends notifications when emails are delivered to mailboxes, so they can contain backward references to messages.
  • Mailboxes must be involved if you want to interact with mailbox but you can think of the Gateway as a general-purpose tool for changing some user parameters in LDAP by means of SMS messages sent.
  • SMPP connectivity is through the Messaging Server SMS Channel but also SEMA-OIS, UCP, and CIMD2 connectivity independently, if needed, as not all SMSC devices use SMPP.
Very briefly:
  • Use SMS Channel if you want to configure your Messaging Server to be an SMTP to SMS converter, so mail messages transferred through are converted to SMS messages and sent to mobile users, regardless of whether they have mailboxes on your server.
  • Use SMS Gateway if you want your Messaging Server users to be notified with SMS about messages that arrive in their mailboxes and to be able to manipulate them by means of SMS messages.

Another Alternative: Multimedia Messaging Service (MMS) Support in Messaging Server
MMS, like Short Messaging Service (SMS), is a way to send a message from one mobile device to another. The difference is that MMS can include not just text, but also sound, images and video. It is also possible to send MMS messages from a mobile phone to an email address.
While Messaging Server has supported SMS for some time, it does not provided built-in support for MMS. Instead, Sun has partnered with companies such as Logica CMG to provide the additional functionality required.

For More Information
For more information on the SMS Mailbox Access and Calendar Gateway, contact Andrzej Zagrodzinski or Wojciech Chemijewski.
See the BigAdmin Communications Suite Hub for more information about Sun Java Communications Suite:
http://www.sun.com/bigadmin/hubs/comms
*Note: Content from Wikipedia is available under the GNU Free Documentation License (GFDL).

How To – Create Your Own Custom ROM for Android, Part 2 – Creating Your First ROM


I. Before You Begin

1. We are assuming you have already setup the Android kitchen. If not, use our How To Setup The Kitchen procedure and then come back to this one when done.
2. We are also assuming you have already done our How To Root and How To Load a Custom ROM for your phone and have a custom recovery image.
2. This ONLY works for HTC Android devices at the moment, later versions might support others (check here for an update when it does).
3. Open the Kitchen in your Ubuntu Virtual Machine we created in the Kitchen Setup procedure by typing ./menu in the Terminal window in Ubuntu. Leave it open.
4. All of this is done INSIDE THE UBUNTU VIRTUAL MACHINE (that includes when I say “save to your computer” anywhere in here, means save to you Ubuntu Virtual Machine)!

II. Find a ROM to Dissect

There are two kinds of ROMs you can dissect to create your own custom ROM; Stock ROMs and Custom/Cooked ROMs. DsiXDA, creator of the ROM kitchen we are using, has put together a list of places to get stock ROMs for different devices and a quick how to load them into the kitchen:
From a Cooked ROM (Easiest Method):
1. Copy the update.zip (or equivalent ZIP file) to the original_update folder in the kitchen
2. Type the number for the option “Setup Working Folder from ROM” and hit enter in the Kitchen to create your working folder. (So if its number is 1, type 1 then hit enter).
From a Shipped ROM:
1. Find the shipped ROM for your device, usually from htc.com or from searching xda-developers (check the Wiki or sticky posts under your device’s sub-forum).
The links below may help:
2a. If the shipped ROM is in a .ZIP format, then simply extract the system.img and boot.img.
2b. If the shipped ROM is in .EXE format, then do the following:
A. In Windows, run the shipped ROM’s .EXE file till it gets to the first dialog. Stop there but don’t close the window yet.
B. Go to Start->Run and type: %TEMP%
C. When the folder opens, search for Rom.zip. Then, open it with an unzip tool. If you get errors trying to open the ZIP file with WinZip or the default Windows unzip program, then use 7Zip (download from here) to extract it.
D. Extract only two files from Rom.zip: system.img and boot.img
3. Copy the two .IMG files to your kitchen’s img_files folder in your Ubuntu Virtual Machine.
4. In the Terminal window that you opened in Section I, type 1 and hit enter to create a working folder from the two .img files.
Now, that you have either the update.zip in the original_update folder of the kitchen OR the system.img and boot.img of a shipped ROM in the img_files folder of the kitchen, you are ready to play with the ROM to make it your own.

III. Tweaking the Imported ROM Using the Automated Options in the Kitchen

So this is a basic kitchen, but you can do things like, add Root support, add/remove apps from the ROM, enable saving apps to the sd card, enabling Wifi tethering, do some automatic optimizations, and a few other things automatically just by selecting the option and hitting enter. It even allows you to put in your own scripts for the ROM to run (but that’s for more advanced users who know how to create scripts of course).
1. After importing a ROM using section II, select the options you want to do to the ROM (by typing the number of the option you want into the terminal/kitchen window and hitting enter. They are all pretty self explanatory.)
2. Continue this until you have all the automated options you want in the new ROM.

IV. Adding/Removing Applications from the ROM

1. In your Ubuntu Virtual Machine, goto Places at the top. Then click on Home Folder, then the WORKING folder that was created in section II when you dissected the original ROM or img files. Then goto system > app. (Also check Data > App as .apks can be put in there as well).
2. In the app folder you will see all the .apk files for all the applications you have currently in the ROM. Simply delete the ones you do not want to remove them from the ROM.
3. To add applications, simply copy any .apk file for the applications you want to add into the app folder.

V. Repackage the ROM so it can be Flashed onto a Phone

1. Once you have done whatever changes you want, you just need to type 99 and hit enter in the kitchen/terminal for the kitchen to take the working folder you have been messing with and compile it into a flashable update.zip ROM.
2. Once it is done compiling the ROM, we can transfer it to our phone.

VIa. Setup Ubuntu to See Your Phone via USB

1. In the Virtual Box windows with Ubuntu in it, click on Devices at the top then click Install Guest Additions. (It should autostart, if it doesn’t, click on the CD that appeared on the desktop in Ubuntu and then click on Autostart.sh. It will ask you for your password you created when setting up Ubuntu, put that in and let it install).
2. Once the Guest Additions are installed, close the Virtual Box Ubuntu Window (choose to Power Down the Machine).
3. Now, open Virtual Box itself (not Ubuntu) and highlight the Ubuntu machine, then click on Settings at the top.
4. Click on USB and make sure Enable USB Controller and Enable USB 2.0 are both enabled.
5. Now plug in your Android phone (do NOT mount the SD card, just plug it in).
6. Now in the USB menu of Virtual Box, click the + symbol on the right and then select your Android Device (name may be different).
7. Once that is installed, unplug your phone.
8. Now, Start your Ubuntu Virtual Box.
9. Once Ubuntu boots up, plug in your Android phone (do not mount the memory card yet) and look for the USB symbol at the bottom (fourth icon from the left) and hover over it and wait for it to say USB Device detected and display your phone. Once that happens, mount the sd card by pulling down the notification bar on your phone and clicking mount.
10. Ubuntu should pop up your SD card on the desktop (if any prompts come up just select do nothing and click ok). We can now transfer files to the memory card of our phone.

VIb. Use RapidShare to Transfer the File from Ubuntu to Windows (if Section VIa was giving you trouble)

1. If you can’t get the USB to work in Ubuntu, then simply open a Firefox browser window, goto Rapidshare.com and upload the ROM to there.
2.Once it is done uploading, ON YOUR WINDOWS COMPUTER NOT UBUNTU, put in the link it gave you when you finished uploading it, to download it to your Windows computer so we can transfer it to your phone.

VII. Flash the ROM

5. Copy the .zip file to the root of your SD card (NOT in any folders, just on the SD card itself).
6. Unplug the phone and turn it off.
7. Turn it back on by holding down home and power (do not let go until the recovery screen comes up) to get to recovery mode (you must have a custom recovery screen to do this, if you don’t find out How To Root and Load a ROM procedure for your phone and do those first).
8. Now select Nandroid Backup to create a backup before we flash the new ROM.
9. Once the backup is done, select Wipe Data / Factory Reset in recovery mode.
10. Select flash zip from sd card and select the ROM you just put on the sd card.
11. Once it is done flashing, click reboot. Enjoy!
Enjoy! Will update this as we add more things for you to tweak :) Feel free to suggest some in the meantime.
Want to Flash a New Splash Screen on Your 320×480 Resolution Android Device? Here’s how.
Thanks to DsiXDA for his awesome kitchen!

Mtk Flash Tool V3.3.1 NEW

Mtk Flash Tool V3.3.1 NEW
tk Flash Tool with Auth File and Memory Test option

Supported BaseBand Chips.

6205,6223,6218.6208,6218b,6219,6217,6228,6227,6229 ,6226,6230.6225

Bug fixes:
1. Solve Chip UID boundary condition.
2. Solve SLA_Challenge race-condition issue.
New features:
1. [BROM DLL/UI] EDGE PC Card download
2. [DA/BROM DLL/UI] NOR+DRAM download
3. [DA/BROM DLL/UI] Enhance Memory Test Tool
4. [BROM_DLL/DA] Support MT6226D download.
5. [BROM_DLL/DA] Support MT6223P download.
6. [DA] Supports new NOR Flash device
[ST] M58WR016QT
[ST] M58WR016QB
[ST] M58WR032QT
[ST] M58WR032QB
[INTEL] PF38F60xxM0x0xx
[INTEL] PF38F60xxM0x1xx
[SPANSION] S29NS016J
[SPANSION] S29NS032J
[SPANSION] S29NS064J
[SPANSION] S29NS128J
Enhancements:
1. If Block 0 is bad when NFB downloading, FlashTool will stop and popup error message.
2. When first downloading, Flash checking is obsoleted on Un-secure BB.
3. SEC_RO and CUST_PARA file is automatically selected when scatter file is chosen.
4. FlashTest_AllInOne_DA.bin is obsoleted,
Memory Test feature is integrated into MTK_AllInOne_DA.bin.
Please use new UI to do Memory Test.


http://rapidshare.com/files/14871252...3.3.1.rar.html


http://forum.gsmhosting.com/vbb/f457/

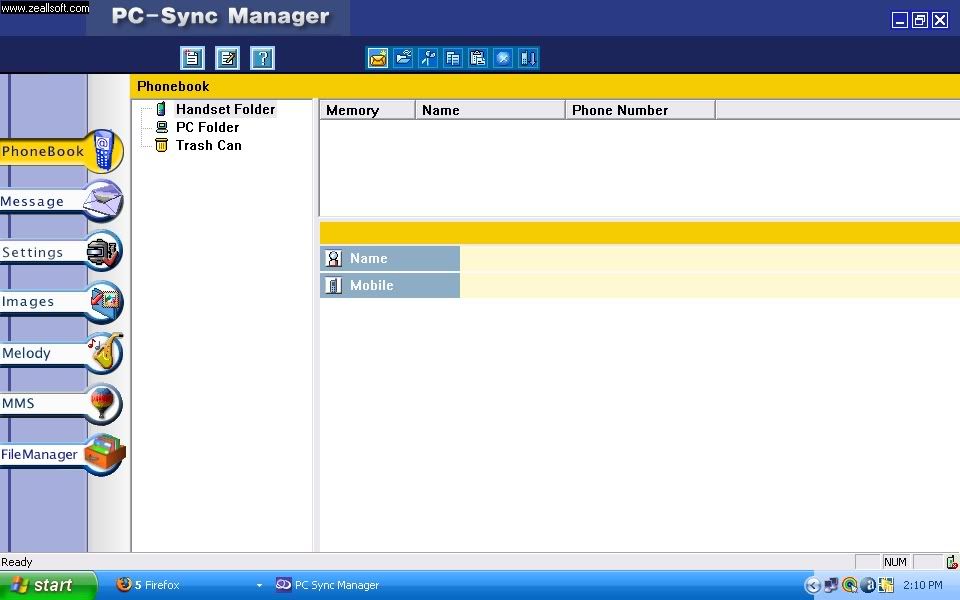
China All Mobile PC Conactivity Solution

China Pc Suite
China All Mobile PC Conactivity Solution

pic

1) Install China Pc Suite first.
Download: 
http://rapidshare.com/files/124983675/China_PhoneSuite.rar | 2878 KB

2) Connect mobile phone to pc. Select Com from three options display on the phone. Windows will ask to install. Install driver. If required, pont to .inf file.
Download driver:
http://rapidshare.com/files/124983919/USB__MT6227_Driver.zip | 31 KB
or
http://rapidshare.com/files/124983835/USB__MT6227_Driver.zip | 31 KB

Now it is ready to connect phone to PC.
Enjoy. Get help from the help icon of PC suite.
Works tremendously with all chinese phone. Tested.